Step-by-Step Guide to Creating Complex Quilts for Beginners
Are you a beginner quilter looking for a step-by-step guide to creating complex quilts? Look no further! As a quilter myself, I understand the challenges of taking on a complex quilt project. That’s why I’ve created this comprehensive guide to help you get started. In this guide, I’ll walk you through the basics of quilting, from selecting the right fabrics and tools to piecing and quilting your quilt top. I’ll also provide tips and tricks to help you create beautiful, complex quilts with ease. With this guide, you’ll be able to create stunning quilts that you can be proud of. So, let’s get started!
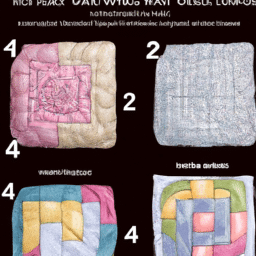
Choosing the Right Fabric for Your Quilt
When it comes to quilting, choosing the right fabric is essential. It can make or break the look of your quilt, so it’s important to take the time to select the right fabric for your project. There are a few things to consider when selecting fabric for your quilt.
First, consider the type of quilt you’re making. Different types of quilts require different types of fabric. For example, a traditional quilt may require a heavier weight fabric, while a modern quilt may require a lighter weight fabric.
Next, consider the color and pattern of the fabric. You want to choose a fabric that will complement the overall look of your quilt. If you’re making a traditional quilt, you may want to choose a fabric with a classic pattern, such as a floral or paisley. If you’re making a modern quilt, you may want to choose a fabric with a bolder pattern, such as a geometric or abstract design.
Finally, consider the quality of the fabric. You want to choose a fabric that is durable and will last for years to come. Look for fabrics that are made from high-quality materials, such as cotton or linen.
Choosing the right fabric for your quilt is an important step in the quilting process. Take the time to consider the type of quilt you’re making, the color and pattern of the fabric, and the quality of the fabric. With the right fabric, you can create a beautiful quilt that will last for years to come.
Understanding the Basics of Quilting
Quilting is a craft that has been around for centuries and is still popular today. It involves sewing together pieces of fabric to create a quilt top, which is then layered with batting and backing fabric and quilted together. Quilting is a great way to express your creativity and make something beautiful and unique.
To get started with quilting, you’ll need to understand the basics. First, you’ll need to choose the fabrics you want to use. You can use a variety of fabrics, from cotton to flannel, and you can mix and match colors and patterns to create a unique look. Once you’ve chosen your fabrics, you’ll need to cut them into the shapes you want to use for your quilt top. You can use a rotary cutter and ruler to make precise cuts, or you can use scissors and a template.
Next, you’ll need to piece the quilt top together. This involves sewing the pieces together in a specific pattern. You can use a variety of stitches, from straight stitches to more intricate designs. Once the quilt top is pieced together, you’ll need to layer it with batting and backing fabric. The batting provides warmth and insulation, while the backing fabric provides a finished look.
Finally, you’ll need to quilt the layers together. This involves stitching the layers together in a specific pattern. You can use a variety of quilting stitches, from straight lines to more intricate designs. Once the quilt is quilted, you can add a binding to the edges to give it a finished look.
Quilting is a great way to express your creativity and make something beautiful and unique. With a little practice and patience, you can create a quilt that you’ll be proud to show off.
Assembling the Quilt Top
Assembling the quilt top is one of the most exciting parts of quilting. It’s the moment when all of your hard work and planning comes together to create a beautiful quilt.
The first step is to lay out all of your quilt blocks on a flat surface. This is the time to make sure that all of the blocks are facing the right direction and that the colors are arranged in the pattern you want. Once you have the blocks laid out, you can start to assemble them.
Start by sewing the blocks together in rows. Make sure to use a quarter-inch seam allowance and press the seams open as you go. Once all of the rows are sewn together, you can sew the rows together to form the quilt top. Again, use a quarter-inch seam allowance and press the seams open.
Once the quilt top is assembled, you can add borders if desired. Borders can add a nice finishing touch to the quilt and can also help to make it larger. When adding borders, make sure to measure carefully and cut the fabric to the correct size.
Assembling the quilt top is a rewarding experience. It’s the moment when all of your hard work and planning comes together to create a beautiful quilt. With patience and attention to detail, you can create a quilt top that you can be proud of.
Quilting Techniques for Beginners
As a beginner quilter, I was overwhelmed by the number of quilting techniques available. I had no idea where to start or what techniques would be best for me. After doing some research, I found that there are a few quilting techniques that are perfect for beginners.
The first technique I learned was piecing. Piecing is the process of sewing together fabric pieces to create a quilt top. This technique is great for beginners because it doesn’t require any special tools or skills. All you need is a sewing machine, fabric, and thread. You can use a variety of fabrics and colors to create a unique quilt top.
The second technique I learned was applique. Applique is the process of attaching fabric pieces to a quilt top. This technique is great for adding texture and interest to a quilt. You can use a variety of fabrics and colors to create a unique quilt top.
The third technique I learned was quilting. Quilting is the process of stitching together the layers of a quilt. This technique is great for beginners because it doesn’t require any special tools or skills. All you need is a sewing machine, batting, and thread. You can use a variety of quilting patterns to create a unique quilt top.
The fourth technique I learned was binding. Binding is the process of attaching a binding to the edges of a quilt. This technique is great for beginners because it doesn’t require any special tools or skills. All you need is a sewing machine, binding, and thread. You can use a variety of fabrics and colors to create a unique quilt top.
These four quilting techniques are perfect for beginners. They are easy to learn and don’t require any special tools or skills. With a little practice, you can create beautiful quilts that you can be proud of.
Finishing Touches for Your Quilt
Finishing touches for your quilt can be the most exciting part of the quilting process. It’s the time when you get to add the final touches to your quilt and make it look perfect.
The first finishing touch is to add a binding. This is the fabric that goes around the edges of the quilt and gives it a finished look. You can choose a fabric that matches the quilt or one that contrasts with it. You can also choose a binding that is a different color or pattern than the quilt itself. Once you’ve chosen the binding, you’ll need to measure and cut it to the right size. Then you’ll need to sew it onto the quilt.
The next finishing touch is to add a backing. This is the fabric that goes on the back of the quilt and gives it a finished look. You can choose a fabric that matches the quilt or one that contrasts with it. You can also choose a backing that is a different color or pattern than the quilt itself. Once you’ve chosen the backing, you’ll need to measure and cut it to the right size. Then you’ll need to sew it onto the quilt.
The third finishing touch is to add a label. This is a great way to personalize your quilt and make it unique. You can choose a fabric that matches the quilt or one that contrasts with it. You can also choose a label that is a different color or pattern than the quilt itself. Once you’ve chosen the label, you’ll need to measure and cut it to the right size. Then you’ll need to sew it onto the quilt.
The fourth finishing touch is to add a quilting design. This is the design that you stitch onto the quilt to give it texture and interest. You can choose a design that matches the quilt or one that contrasts with it. You can also choose a quilting design that is a different color or pattern than the quilt itself. Once you’ve chosen the quilting design, you’ll need to measure and cut it to the right size. Then you’ll need to stitch it onto the quilt.
The fifth and final finishing touch is to add a border. This is the fabric that goes around the edges of the quilt and gives it a finished look. You can choose a fabric that matches the quilt or one that contrasts with it. You can also choose a border that is a different color or pattern than the quilt itself. Once you’ve chosen the border, you’ll need to measure and cut it to the right size. Then you’ll need to sew it onto the quilt.
These are the five finishing touches that you can add to your quilt to make it look perfect. With these five steps, you can create a beautiful quilt that you can be proud of.
Creating complex quilts can be a daunting task for beginners, but with the right guidance and a step-by-step guide, it can be a rewarding and enjoyable experience. With the help of this guide, you can learn the basics of quilting, from selecting the right fabrics and tools to piecing and quilting the quilt top. You can also learn how to bind and finish the quilt, as well as how to care for it. With patience and practice, you can create beautiful and complex quilts that will last for years to come.