What to sew by machine
Are you thinking about learning how to sew by machine? Whether you want to start a new hobby or revive an old one, sewing by machine can be a fun and rewarding experience.
In this article, we are going to teach you the basics of sewing by machine and give you some tips on how to get started. We will also go over the different types of machines available and what kind of fabric they are best suited for.
What Are Some Things You Can Sew By Machine?
Some things you can sew by machine are clothes, curtains, and quilts. You can also sew by hand, but it is much slower. Machine sewing is faster because the needle moves up and down very quickly and the thread is automatically fed through the fabric.
When you are sewing by machine, you need to be careful that you do not sew too fast or else the needle can break. You also need to be careful that you do not sew too slow or else the thread will bunch up. The best way to avoid these problems is to practice sewing on a scrap piece of fabric before you start sewing on your project.
Sewing by machine is a great way to save time when you are working on a project that requires a lot of stitching. It is also a great way to make sure that your stitches are all even and consistent.
What Do You Need To Know Before Sewing By Machine?
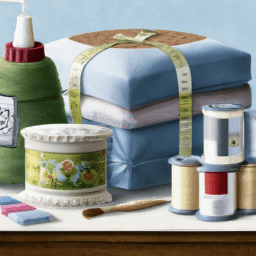
There are a few things you need to know before sewing by machine. First, make sure you have the right supplies. You’ll need a sewing machine, of course, as well as thread, fabric, scissors, and a measuring tape. It’s also helpful to have a seam ripper (a small, sharp tool that’s used to remove stitches), pins, and a thimble (to protect your finger when pushing the needle through the fabric).
Second, take the time to read your sewing machine’s manual. This might seem like a no-brainer, but it’s important to familiarize yourself with your machine and how it works before you start sewing. That way, you’ll be less likely to make mistakes or damage your machine.
Third, practice sewing on some scrap fabric before you start working on your project. This will help you get a feel for how the machine works and how to control the fabric as you sew. It’s also a good opportunity to test out different stitches and see how they look on fabric.
Once you’ve gathered all the supplies you need and familiarized yourself with your sewing machine, you’re ready to start sewing! Just remember to take your time, relax, and enjoy the process.
How To Thread A Sewing Machine
Threading a sewing machine is not as difficult as it may seem. With a little bit of practice, you’ll be able to do it in no time! Here are the steps:
1. Start by raising the needle to its highest position. This will give you more room to work with and make it easier to thread the machine.
2. Next, take your thread and feed it through the eye of the needle from back to front.
3. Once the thread is through the needle, pull it down towards the base of the machine. You’ll see that there is a small guide there that the thread will need to go through.
4. Continue feeding the thread through the guides until you reach the tension disk. The tension disk is responsible for keeping the tension on the thread while you’re sewing.
5. Finally, wrap the thread around the bobbin a few times and then insert it into the bobbin case. Make sure that you’re holding onto the end of the thread so that it doesn’t get pulled into the case!
How To Wind A Bobbin
Before you can start sewing, you need to wind the bobbin. This holds the thread that will be used to stitch the fabric together. The first thing you need to do is find the right thread for your project. Once you have the right thread, follow these steps to wind the bobbin:
1. Insert the thread into the spool pin at the top of the machine.
2. Wrap the thread around the tension disc on the side of the machine.
3. Pull the thread down and insert it into the guide hole on the bobbin.
4. Hold onto the end of the thread and press down on the foot pedal to start winding the bobbin.
5. When the bobbin is full, release the foot pedal and cut off the excess thread.
Now your bobbin is ready to use!
The Difference Between Straight And Zigzag Stitches
There are two main types of stitches that are used on sewing machines: straight stitches and zigzag stitches. Straight stitches are the most basic type of stitch and are simply a straight line of thread. Zigzag stitches are more complex, and as their name suggests, they involve a series of zigzag lines.
The main difference between these two types of stitches is their purpose. Straight stitches are mainly used for construction, while zigzag stitches can be used for both construction and decoration. Zigzag stitches are also more versatile, as they can be used to create a variety of different patterns.
When it comes to sewing, it’s important to choose the right type of stitch for the job at hand. If you’re not sure which type of stitch to use, it’s always best to consult a sewing expert or look up a sewing tutorial online.
Basic Sewing Machine Troubleshooting Tips
If your sewing machine isn’t working properly, there are a few things you can do to troubleshoot the issue. First, check to make sure that the machine is properly plugged in and that the power switch is turned on. Next, take a look at the bobbin case and make sure that the bobbin is inserted correctly. If the bobbin case looks fine, then check to see if the needle is inserted properly and is the correct size for the thread you’re using. Finally, if none of these solutions work, consult your sewing machine’s manual or take it to a professional for further assistance.
Conclusion
In conclusion, there are many things you can sew by machine. With a little know-how, you can sew by machine almost anything. Use the tips in this blog post to get started and be sure to practice on some scrap fabric before moving on to your final project. Need more help? Check out our sewing by machine tutorial video series for step-by-step instructions.