How to thread the sewing machine
Are you a beginner sewer? worried about threading the sewing machine? Don’t feel alone. A lot of people are afraid to thread the machine because they think it’s too hard.
But don’t worry, we are here to help. This article is going to teach you how to thread the sewing machine with simple step-by-step instructions.
Hopefully, after reading this you will no longer be afraid of threading your machine and you can start sewning garments like a pro!
At the beginning of every sewing project, from the most mundane to the most complex, from the quickest to the most tedious, there is only one thing: get your sewing machine ready.
There are really many models of sewing machines, and on the market you can find a wide variety of sewing machines that will satisfy the most diverse needs in terms of cost and complexity.
However, the procedure for threading the needle is standard and can be used with any sewing machine we supply.
How To Thread The Sewing Machine
Threading a sewing machine can seem like a daunting task, but it’s actually quite simple! Just follow these easy steps and you’ll be threading your machine like a pro in no time.
First, start by finding the spool of thread that you’ll be using. Most machines come with a plastic or metal holder for the spool, which helps to keep it in place while you’re sewing. Once you’ve found the spool, take a look at your machine’s manual to see which direction it needs to go in order to thread correctly.
Next, locate the needle on your machine. You’ll need to raise the presser foot before inserting the thread into the needle- this will help to keep the thread from getting tangled. Once the presser foot is raised, simply guide the thread through the eye of the needle.
Now it’s time to start feeding the thread through the machine. There are usually two ways to do this- either by hand or by using the machine’s automatic feeder. If you’re new to sewing, we recommend starting with the hand method so that you can get a feel for how much thread needs to be fed through before each stitch is made. To do this, simply hold onto the end of the thread and guide it through each of the small holes until it reaches the take-up lever (this is what pulls the thread up and down as you sew).
Once you’ve reached the take-up lever, it’s time to start feeding the thread through the tension discs. These discs are responsible for keeping your stitches even and consistent, so it’s important not to skip this step! Again, refer to your machine’s manual to see which direction the thread needs to go in order to pass through the tension discs correctly.
The final step is to bring the thread back down towards the needle and insert it into one of the lower looper threads. Now all that’s left to do is pull onthethread until it’s tight, then hit that Sew button and you’re readyto go!
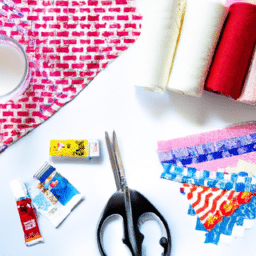
What Type Of Thread To Use In The Sewing Machine
Different types of fabrics require different types of threads. For example, if you’re sewing with a delicate fabric, you’ll want to use a delicate thread so that it doesn’t damage the fabric. The same goes for heavier fabrics – you’ll want to use a stronger, more durable thread. In general, there are four main types of threads: cotton, polyester, nylon, and acrylic. Each type of thread has its own benefits and drawbacks, so it’s important to choose the right one for your project.
Cotton threads are strong and durable, but they can be prone to breaking if not used correctly. They’re also not as resistant to heat as other types of threads, so if you’re using a hot iron or steam while sewing, cotton threads may not be the best choice.
Polyester threads are also strong and durable, but they have a higher melting point than cotton threads, so they’re less likely to break under heat. They’re also less likely to shrink when exposed to water or steam, making them a good choice for projects that will be exposed to moisture. However, polyester threads can be more difficult to work with because they’re slippery and they can cause fabric to pucker.
Nylon threads are very strong and resisting breaking and stretching. They also have a high melting point, so they can withstand heat exposure without breaking. Nylon threads are often used in outdoor applications because they don’t rot easily in humid or wet conditions. However, nylon is a synthetic material, so it may not be ideal for some projects.
Acrylic threads are made from synthetic materials, so they share many of the same properties as nylon threads. They’re strong and resistant to breaking and stretching, and they have a high melting point. Acrylics are often used in outdoor applications because of their resistance to humidity and moisture. However, like nylon threads, acrylics may not be ideal for some projects because they’re synthetic materials.
How To Change The Needle In The Sewing Machine
Assuming you have a standard home sewing machine, the process for changing the needle is fairly straightforward. First, make sure that the machine is unplugged from any power source. Next, raise the needle to its highest position by turning the handwheel towards you. Then, using your right hand, unscrew the needle clamp screw and remove the old needle.
Now it’s time to insert the new needle. Make sure that the flat side of the needle is facing to the back, and insert it into the needle bar until it stops. Once the new needle is in place, tighten the needle clamp screw until it is snug but not too tight. You can now lower the needle by turning the handwheel away from you and test-sew on a scrap piece of fabric to see if everything is working properly.
Types of needles
The first step you must take is choosing a needle for your sewing machine: it is crucial to choose the needle that best suits the project and the desired results.
Choosing the wrong needle can ruin not only the fabric and our work, but the entire sewing machine.
Using poor quality or unsuitable needles can damage the machine’s mechanics, and in the worst case, render the machine completely unusable.
So it is very important to make sure you are using the correct needle.
How to choose the right needle
There are literally hundreds of different types of needles on the market, suitable for every task and need: from embroidery to sewing on extremely durable materials such as leather, each needle has its own specialty and can do its best All you can, guarantee a good job.
There are two basic variables to consider when selecting a needle for a job:
- Needle attack
- Prompt type
Needle attack
The connection of the needle depends directly on your sewing machine model.
Not all computers are designed for the same types of attacks!
It is therefore necessary to pay special attention to the end part of the needle (called the „needle“) when purchasing, and to always check that it is compatible with the machine model: incompatible models may result in an imperfect fit, with broken needles and Risk of clogging the machine.
The types of sewing machine needles are:
- Flat head
- Round head
- „Overlock“ and cut and sew (aka overlock)
Check your sewing machine manual to find out which type is best
Needle point
Another essential element of the needle is the point: each type of needle has a different shape and size of the point, designed for different types of fabrics and yarns.
There is no universal code, each manufacturer has its own acronym. However, needles are usually classified according to the sewing material.
How To Clean The Sewing Machine
It’s important to keep your sewing machine clean and well-oiled to prevent damage and keep it running smoothly. The frequency of cleaning will depend on how often you use the machine, but as a general rule of thumb, you should give it a good cleaning every few months.
Here’s a step-by-step guide on how to clean your sewing machine:
1. Unplug the machine from the power source and remove any thread or fabric that is still attached.
2. Use a brush attachment on your vacuum cleaner to remove any dust or lint from the surface of the machine. Be sure to also vacuum out the lint trap inside the machine.
3. Use a cotton swab dipped in rubbing alcohol to clean the needle and other metal parts of the machine.
4. Wipe down the exterior of the machine with a damp cloth. Avoid getting water inside the machine, as this can damage sensitive components.
5. Once everything is dry, replace any thread or fabric that was removed in step one and plug the machine back into its power source.
Troubleshooting Tips For The Sewing Machine
If your sewing machine isn’t working properly, there are a few things you can do to troubleshoot the problem. First, check to make sure that the machine is plugged in and that the power switch is turned on. Next, check the needle to see if it is inserted properly and is the correct size and type for the fabric you are using. If the needle is inserted correctly and is the right size and type, then check to see if the thread is properly threaded through the machine. If it isn’t, re-thread it following the instructions in your sewing machine manual. Finally, if none of these solutions solve the problem, take your sewing machine to a qualified repair person for further diagnosis and repairs.
Conclusion
This blog post has outlined how to thread the sewing machine. The steps are easy to follow and will help you get started with your sewing project. Be sure to use the right type of thread and change the needle when necessary. If you have any issues, refer to the troubleshooting tips mentioned in the blog post.